
Overview
Running Linux on Windows 10/11 via WSL is great, which allows you to fully utilize all the development and system tools available on Linux. Like everything in life, your enthusiasm for the new tools will catch up to you. Installing different tools and configuring your Linux environment to run these tools will result in an unstable Linux environment that will impact your day-to-day productivity.
You can alleviate the eventual degradation of your Linux environment by installing and running different Linux distros from Microsoft Store (for example, you can run Ubuntu, Ubuntu 18.04 LTS, Ubuntu 20.04 LTS, Kali Linux, and Debian at the same time), but you will find that some tools work differently in different Linux distro/version.
The solution is to run multiple instances of the same Linux Distro/Version on WSL. This article will provide step-by-step instructions on running multiple instances of the same Linux Distribution/Version on WSL.
Step-by-Step Instructions
Reset Linux Distro on WSL
The first step is to create a baseline of your Linux distro/version. This is needed so you can have a fresh start when your Linux environment becomes unstable.
Step 1.1: Open “Settings”
Step 1.2: Click on “Apps”
Step 1.3: Click on “Apps & features”
Step 1.4: Select Linux Distro Name — e.g., Ubuntu 20.04 LTS
Step 1.5: Click on “Advanced Options” link
Step 1.6: Click on “Reset” button to reset your Linux Distro (e.g., Ubuntu 20.04 LTS) to the initial install state. Please note that everything will be deleted.
Step 1.7: When the reset is completed, start your Linux Distro (e.g., Ubuntu 20.04 LTS) then set up your Linux Distro by entering username and password.
Step 1.8: Run “sudo apt-get update” (for Ubuntu 20.04 LTS) to retrieve information about what packages can be installed, including what updates to currently installed packages are available, from Internet sources.
Step 1.9: Run “sudo apt-get upgrade” (for Ubuntu 20.04 LTS) to install available upgrades of all packages currently installed on the system from Internet sources.
Export Linux Distro on WSL
The second step is to create an export image of your Linux Distro. This image will be used to create multiple instances of the same Linux Distro.
Step 2.1: Open a new command prompt or a new Powershell.
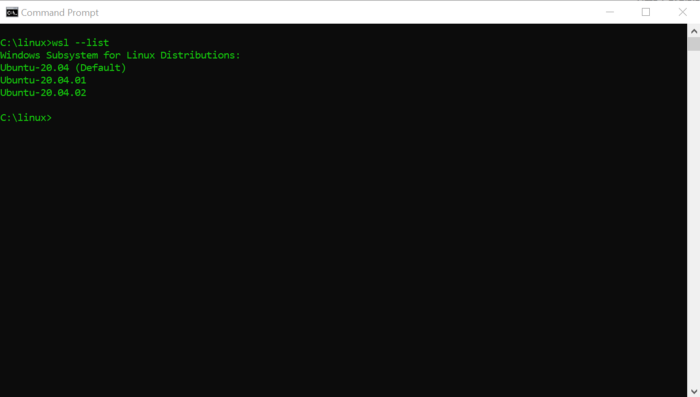
Step 2.2: Run the command
|
|
to view a list of Windows Subsystem for Linux Distributions installed on your computer. For example on my computer, it would be “Ubuntu-20.04”.
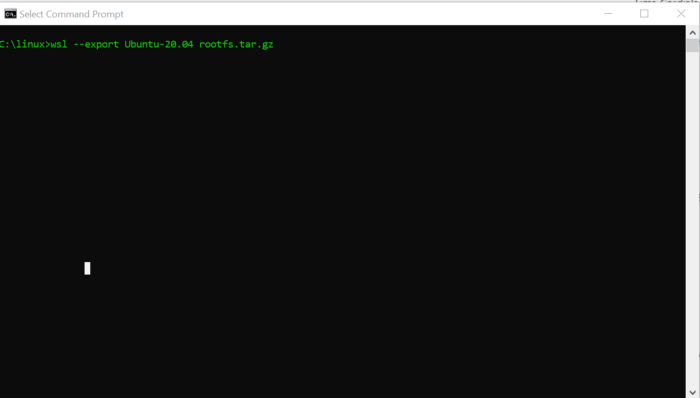
Step 2.3: Run the command
|
|
or
|
|
to export your Linux distros to a TAR file. This will create a file entitled “rootfs.tar.gz” on your computer. Keep this file safe since you will need this file to create a new instance of WSL Linux Distro.
Step 2.4: Copy the newly created file named “rootfs.tar.gz” to your desired directory. For example on my computer, I have copied the file to c: \linux\ubuntu-20.04.02 directory.
Install New Instance of Same Linux Distro on WSL
There are two options to install a new instance of the same Linux distro on WSL.
- Option 1: Install without Launcher
- Option 2: Install with Launcher (Convenient and flexible option using open source software)
Option 1: Install New Instance of Same Linux Distro on WSL without Launcher
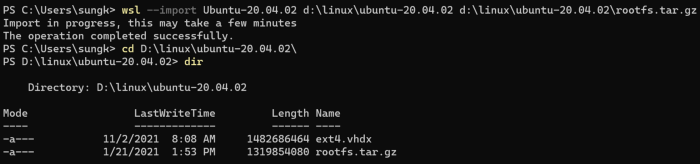
Step 3.1.1. Open a new command prompt or a new Powershell then run the following command to import exported instance as a new instance of Linux in WSL.
|
|
for example,
|
|
I have named DistroName as Ubuntu-20.04.02 to specify this is Ubuntu 20.04 Instance 2.
- For WSL1, the installation process should create \rootfs sub-directory with files under that sub-directory. Delete copied “rootfs.tar.gz” after the installation is completed.
- For WSL2, the installation process should create “ext4.vhdx” file. Delete copied “rootfs.tar.gz” after the installation is completed.
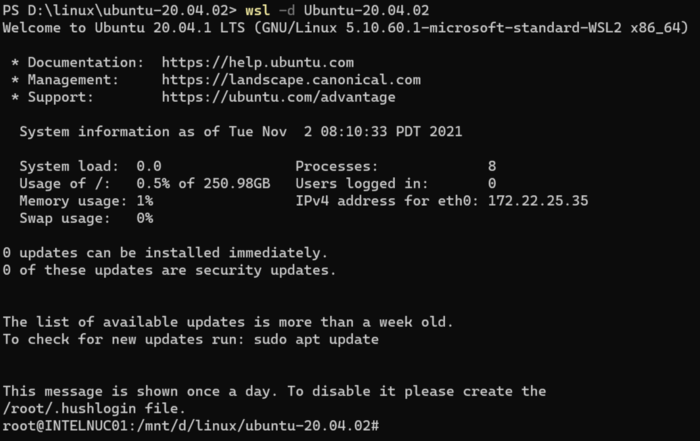
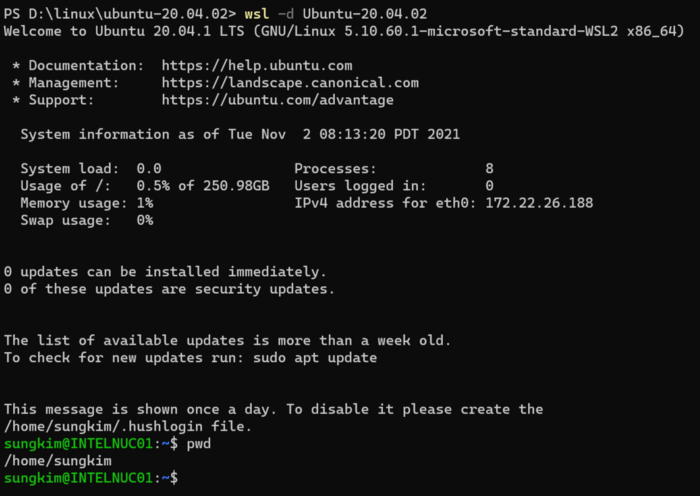
Step 3.1.2. Run the newly imported Linux distro.
|
|
for example
|
|
This should start the new instance of Linux Distro in WSL.
Step 3.1.3. Configure new Linux distro by creating /etc/wsl.conf file.
|
|
then enter the following to wsl.conf file then save the file. This is needed to replicate the default behavior of your default Linux distro instance on WSL where you are logged in as a specified user and mounted to its home directory.
|
|
Please note that you will have to change both Linux Distro name (e.g., Ubuntu-20.04.02) and username (e.g., sungkim).

Step 3.1.4. Restart Linux Distro
Exit out of Linux Distro
|
|
then from either command prompt or PowerShell, enter
|
|
then
|
|
The Linux distro should start with you logged in, instead of root and default to your home directory. You have successfully created a new instance of the same Linux distro on WSL!
Step 3.1.5. If you are using Windows Terminal ([Get Windows Terminal — Microsoft Store](https://www.microsoft.com/en-us/p/windows-terminal/9n0dx20hk701?activetab=pivot: overviewtab)) then a new WSL instance will just show up in Windows Terminal. In Windows Terminal, click on drop-arrow then select the Linux distro name to start your new terminal session. In Windows 11, Windows Terminal is installed by default.
You should be able to run this new WSL instance using Windows Terminal.
Option 2: Install New Instance of Same Linux Distro on WSL with Launcher
The third step is to download, install and configure WSLDL. WSLDL is an open-source Advanced WSL Distribution Launcher / Installer that can be used to configure and launch the same Linux Distro as a different Linux instance.
Step 3.2.1. Download “wsldl.exe” from https://github.com/yuk7/wsldl and save the file to your desired directory. For example on my computer, I have saved the file to C: \linux\ubuntu-20.04.02 directory.
Step 3.2.2. Rename the file “wsldl.exe” to your desired Linux Distro name. For example on my computer, I have renamed to file to “Ubuntu-20.04.02.exe” to denote that this is Ubuntu 20.04 and appended “.02” for instance 2.
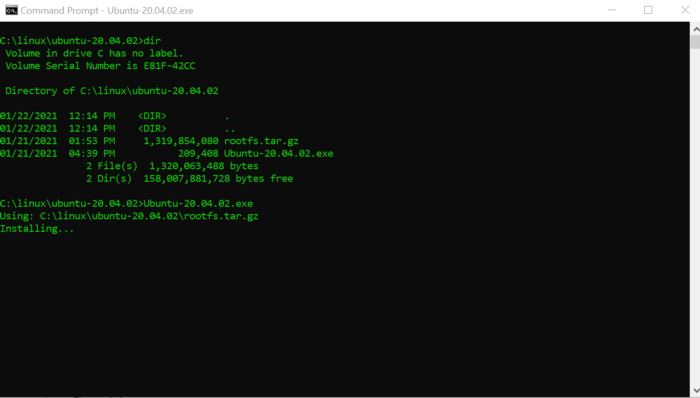
Step 3.2.3. To install WSLDL, open a new command prompt or a new Powershell then run the renamed file. For example on my computer, I have executed the file, entitled “Ubuntu-20.04.02.exe” in C: \linux\ubuntu-20.04.02 directory.
- For WSL1, the installation process should create
\rootfssub-directory with files under that sub-directory. Delete copied “rootfs.tar.gz” after the installation is completed. - For WSL2, the installation process should create “ext4.vhdx” file. Delete copied “rootfs.tar.gz” after the installation is completed.


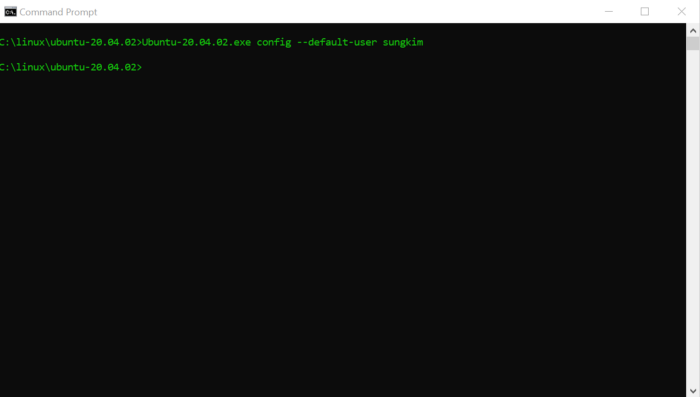
Step 3.2.4. To configure WSLDL to default to your username when you run your Linux Distro on WSL, run the command in the same directory (e.g., C:\linux\ubuntu-20.04.02)
|
|
For example on my computer, it would be :
|
|
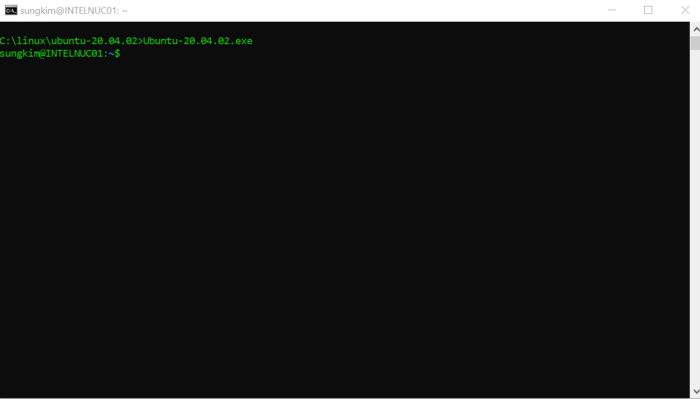
Step 3.2.5. To run a newly installed Linux Distro on WSL, just run the command “Ubuntu-20.04.02.exe” in C:\linux\ubuntu-20.04.02 directory from command prompt or Powershell.
Step 3.2.6: You can pin the new Linux Distro to the taskbar by selecting and right-clicking on the file “Ubuntu-20.04.02.exe” then selecting “Pin to taskbar” from the context menu. To change the icon, you can download the icon here (https://github.com/yuk7/wsldl/tree/main/res) and change the icon to the appropriate Linux Distro.
To install additional instances of the same Linux Distro on WSL, repeat step 3.2.2 to step 3.2.6 with a different name for “wsldl.exe” with a different directory name.
Step 3.2.7. Another option is to use Windows Terminal since every time you complete the process, a new WSL instance just shows up in Windows Terminal. I believe Windows Terminal comes with Windows 11. For Windows 10 users, install it from Microsoft Store.
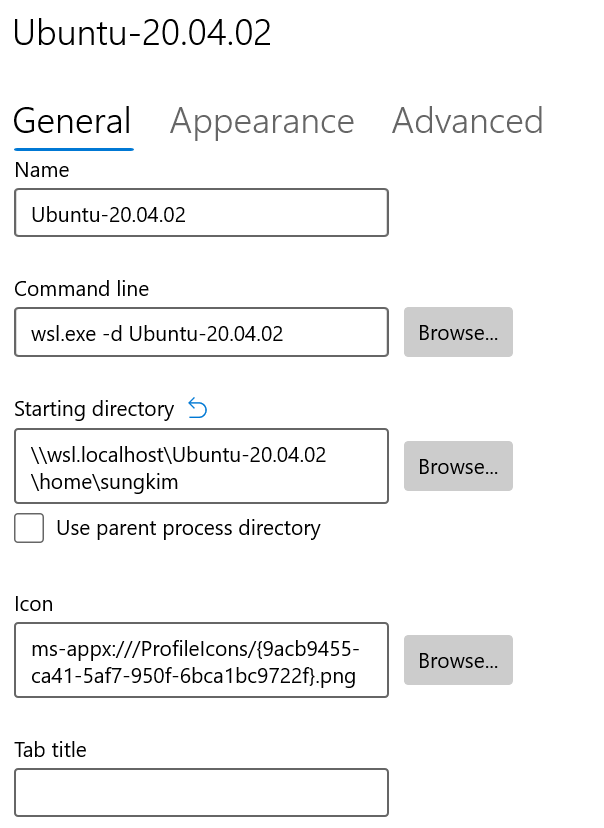
- In Windows Terminal, click on drop-arrow and select “Settings”.
- On the left nav, select the WSL instance. For example, my WSL instance’s name is “Ubuntu-20.04.02".
- Change the “Starting directory” to
\\wsl.localhost\Ubuntu-20.04.02\home\sungkimwhere Ubuntu-20.04.02 is WSL instance name and sungkim is your username as shown below.
You have successfully created a new instance of the same Linux distro on WSL!
Configure your new Linux Environment
The fourth and final step is to configure your new Linux environment so you can start being productive. You will need to change the setting of Windows Terminal though.
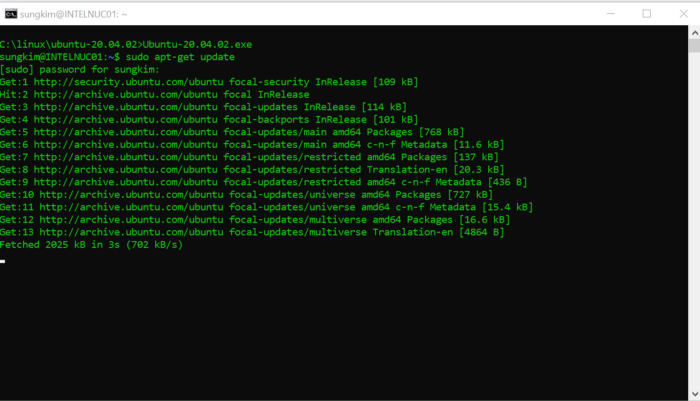
Step 4.1: Run “sudo apt-get update” then “sudo apt-get upgrade” to update your software.
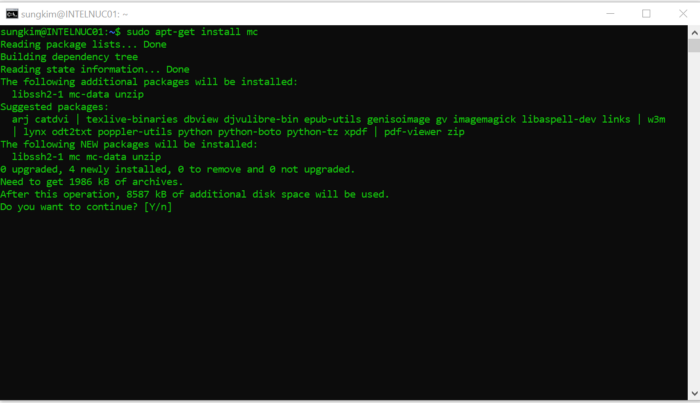
Step 4.2: Install Midnight Commander by running “sudo apt-get install mc”.
Step 4.3: Install Java by running “sudo apt install openjdk-11-jre-headless”.

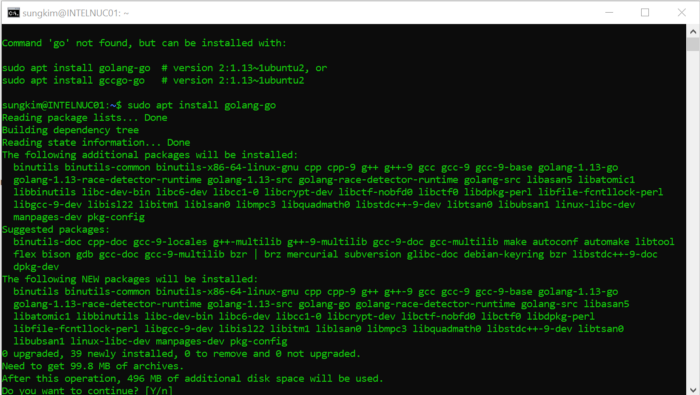
Step 4.4: Install Go by running “sudo apt install golang-go”.
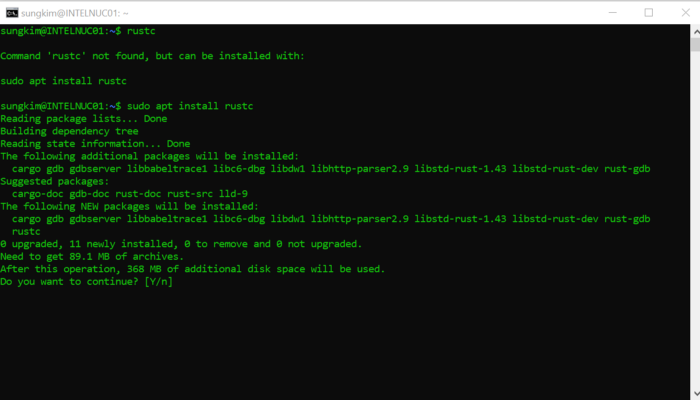
Step 4.5: Install Rust by running “sudo apt install rustc”.
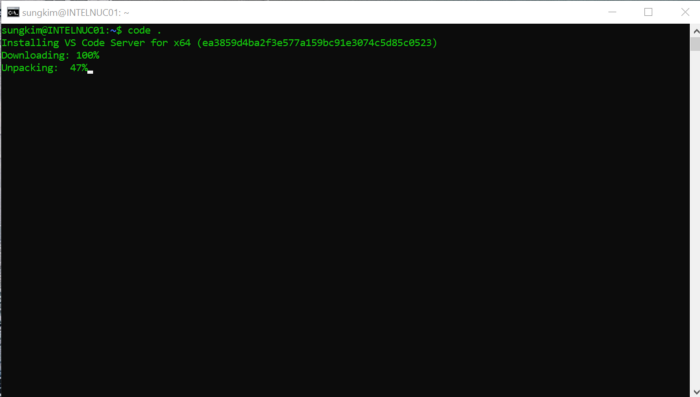
Step 4.6: Install Visual Studio Code by running “code .”
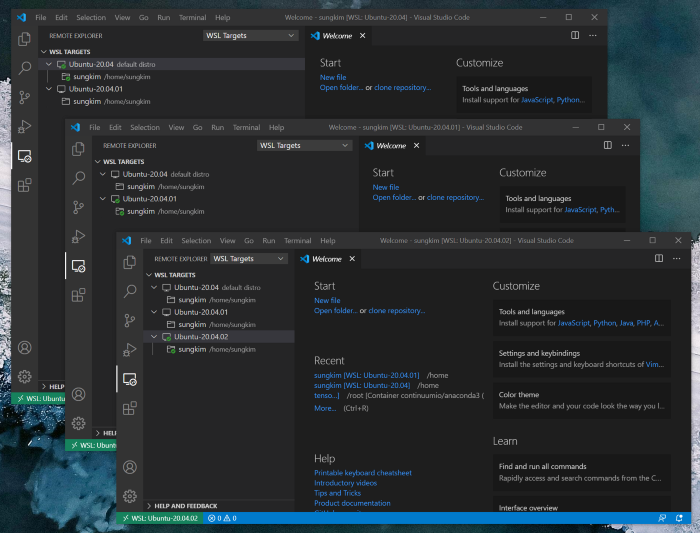
Now, you can start developing in three Linux environments concurrently as shown below:
Conclusion
I hope this tutorial is helpful for you. One tip I would like to leave you with is that whenever you start a WSL session, it will run in the background. You may want to execute “wsl — shutdown” in Powershell to terminate all running WSL instances.